

AimyLogic bot integration
Integrate AimyLogic with JivoChat and let a bot deal with new-coming chats. The bot will handle new dialogues and drop them in Inbox if it runs out of answers so that your agents can carry on.
The bot's chat history can be found in "Contact Center" > "All" in the JivoChat app.
The first step to enable the integration is to sign up in AimyLogic.
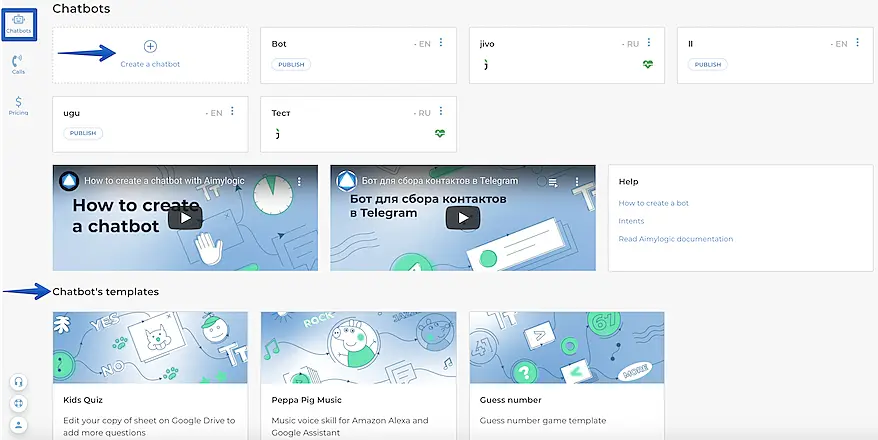
After that, add a new chatbot in the AimyLogic panel. You can either use a template or create your own.
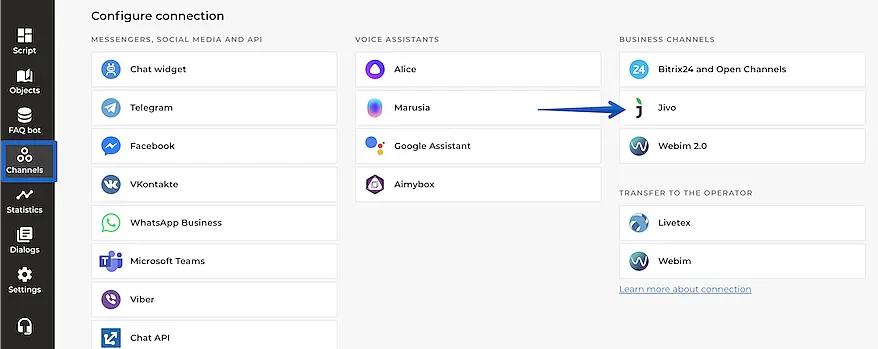
When it's done, go to "Channels" and select "JivoChat" under "Business channels".
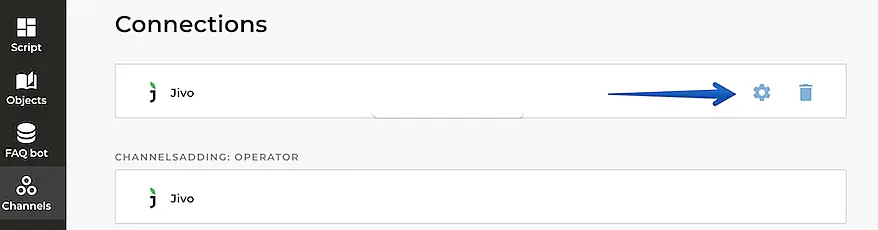
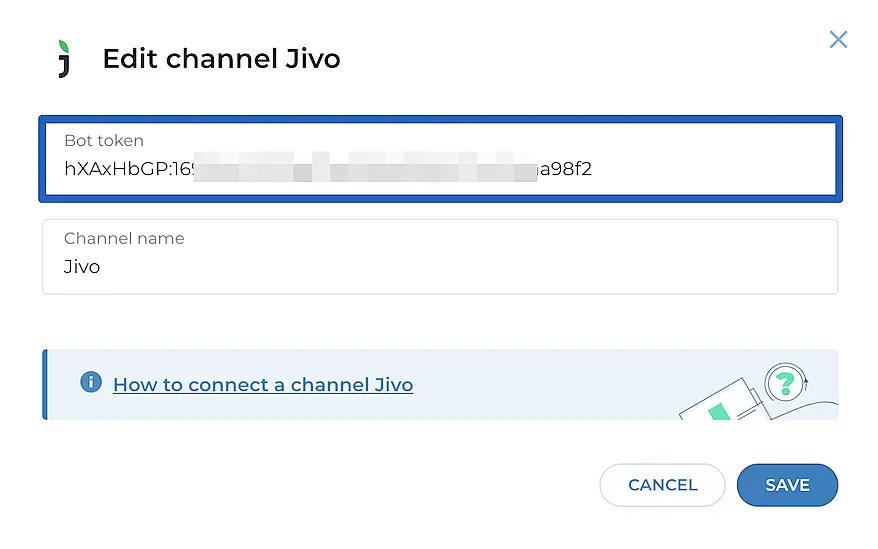
When the channel is connected, go to its settings to get the token.
How to set up the first interaction#
Before activating your chatbot, it is IMPORTANT that you follow these rules at the beginning of the flow:
- Add a screen (a block) to your flow with a global intent that contains the $TEXT variable
- Connect the added $TEXT intent to the first screen of your script (in the bot flow)
- Add a proactive invite and pre-chat buttons in JivoChat according to the words you predefined within your flow in Aimylogic so that the bot understands where it should go after the first message sent by the visitor.
Here's how the beginning of your bot's script should look inside Aimylogic:
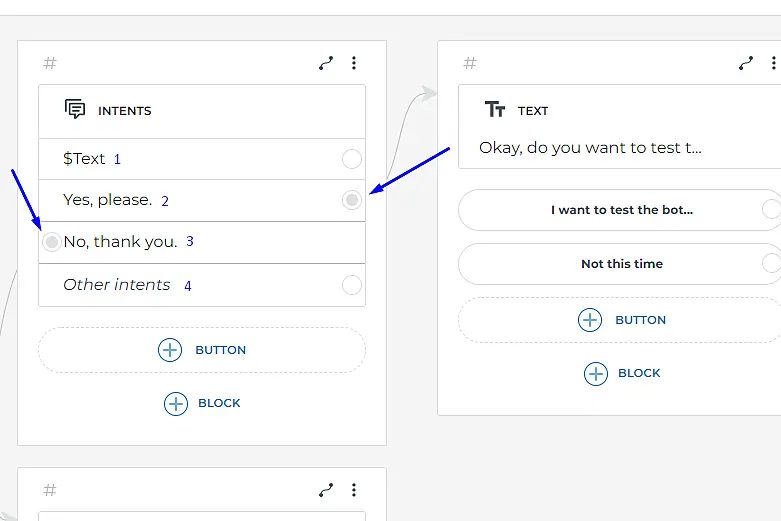
The arrows in the image represent buttons connected to other parts of your chatbot script.
See what each number in the image represents:
- Variable that must be added with the name $Text2. One of the pre-chat buttons that you must add to your channel on JivoChat (it must be exactly the same so that the bot understands the sentence sent by the visitor/customer)3. One of the pre-chat buttons that you must add to your channel on JivoChat (it must be exactly the same so that the bot understands the sentence sent by the visitor/customer)4. It is not possible to connect the "Other intents" button to any location, so you can leave it unchecked.
Important: every time you make changes for your bot you'll need to click "Publish" under the JivoChat channel to apply the changes.
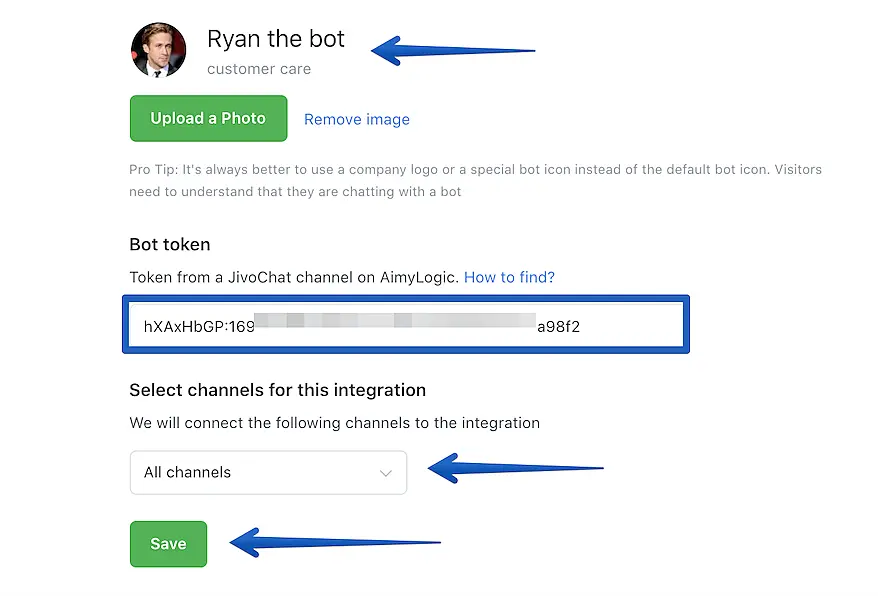
Copy the Token and go to this link. CLICK HERE
Enter a name and title for your bot, upload a picture, insert your bot "token", and select which channels you want to apply the bot for. When all is set, press "Save".
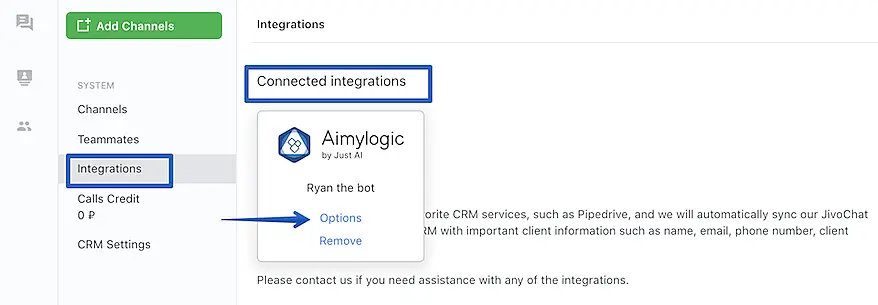
The integration is completed, you'll see the bot under "Connected integrations". You may always change its settings, just hover the mouse over the integration and go to "Options".
Done! You may now test your bot to make sure it works as desired.

