
How to change the agent's settings
To change the agent's settings, please follow the steps below:
1.Open your JivoChat web app or any of our desktop apps and login:

2.Once you've logged in, navigate to the Team tab on the left-hand menu. There, you'll find two tabs: one for Groups and another for Team, which enables you to send direct messages to other users. Additionally, you'll notice a Settings button on the right side, visible for all existing agent accounts, as illustrated below:
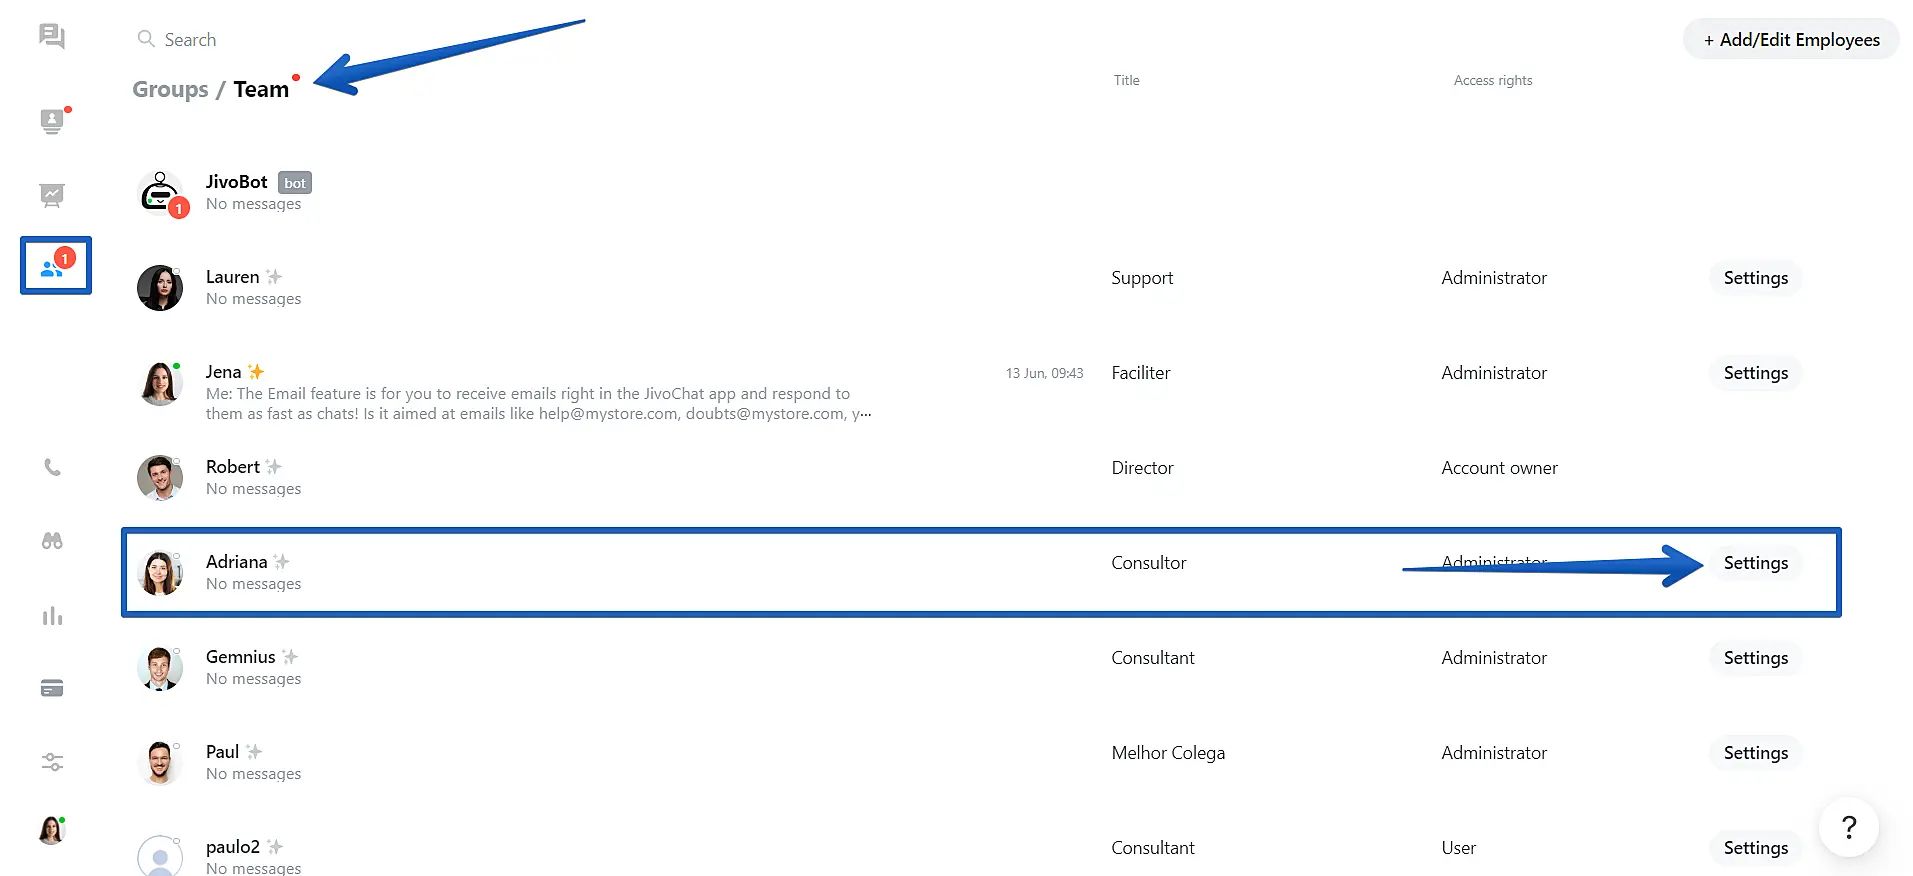
3.If you click on the Settings icon located on the right side of an agent, you'll be able to modify that agent's settings:

- (1)Agent's name on the website
- (2)Agent's title
- (3)Upload the agent's photo or select to add a random photo from our system
- (4)Email (e.g. login name for the agent's application)
- (5)Change the agent's password
- (6)Access Rights (Enable or disable Admin Privileges for the agent)
- (7)Two-factor authentication
Scroll down to check the other settings available:
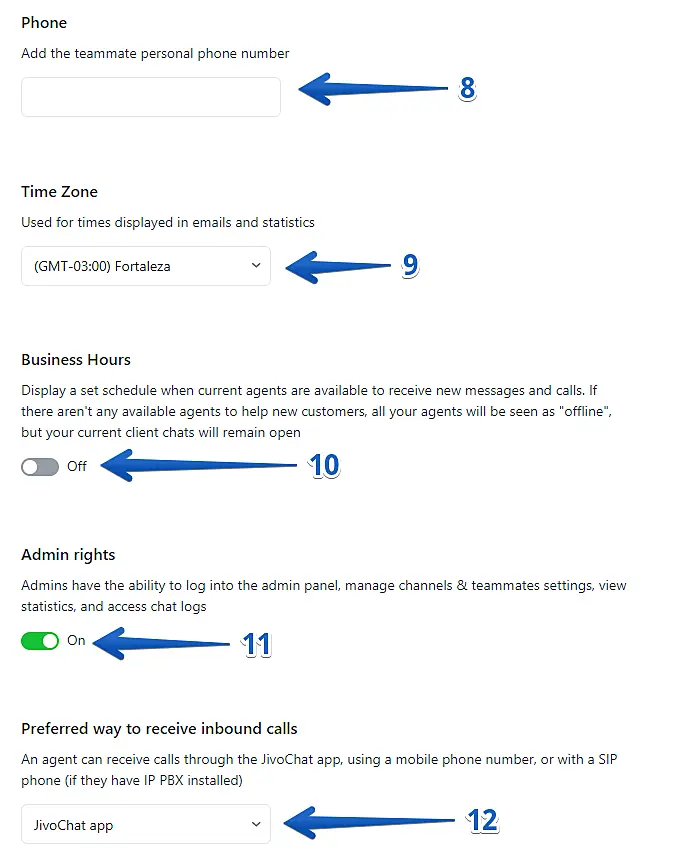
- (8)Phone
- (9)Time zone
- (10)Business Hours
- (11)Admin rights. Enable or disable Admin Privileges for the agent. If this option is enabled, the agent will become an admin for the account
- (12)If you use our Telephony feature, here you can select where the agent will receive the calls at: Agent App, Cellphone or Landline, SIP, or disabled
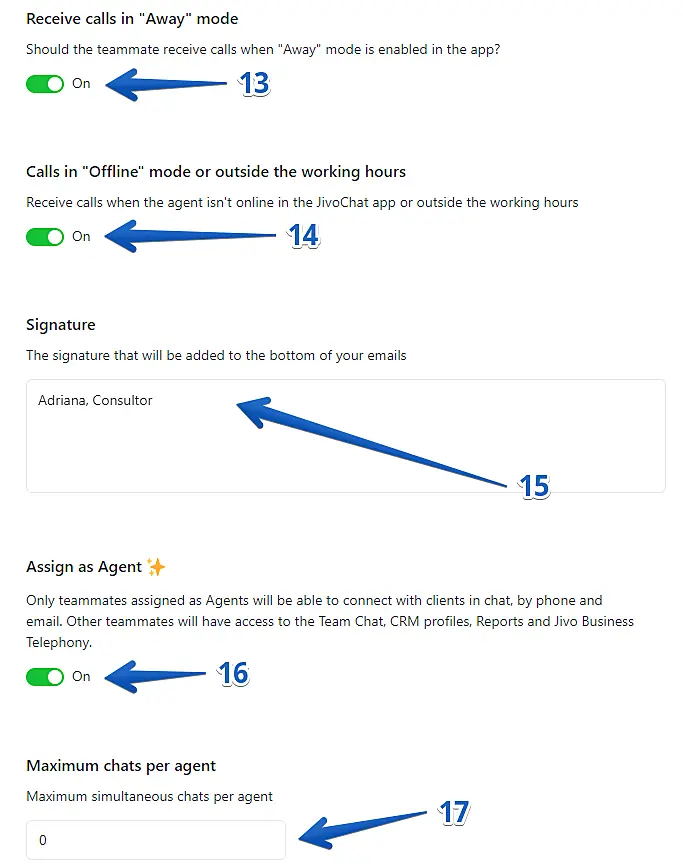
- (13)Choose if the agent will receive calls when in "Away" mode
- (14)Choose if the agent will receive calls when in "Offline" mode
- (15)Signature that will be added to the bottom of your e-mails
- (16)Assign as agent
- (17)Maximum chats per agent (only available on the enterprise plan)
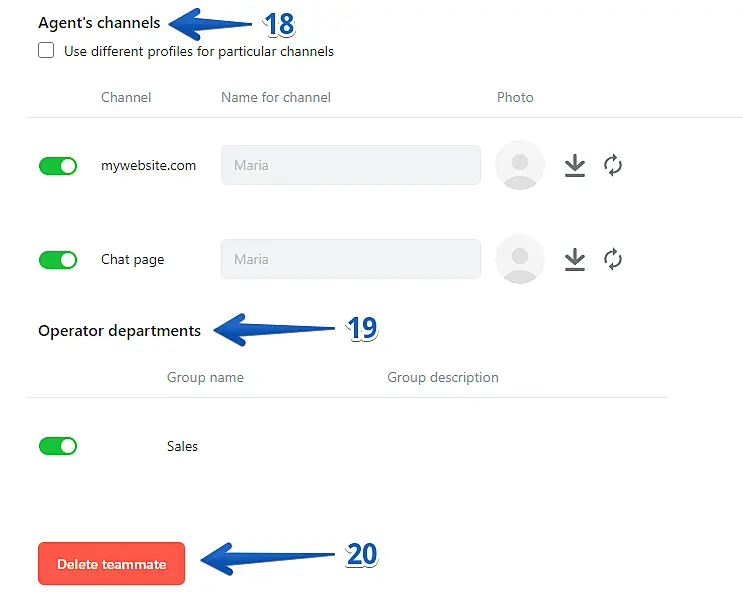
- (18)Here you can enable different names for specific channels in your account. For example, you can show yourself as "John" on one website and as "Edward" on a different website in your account
- (19)Departments (which departments the agent will be delegated to)
- (20)Delete the agent account. Please notice that this action cannot be undone. All information and statistics from the agent will be lost
If you want to change your own details, you can do it from the Team tab as shown above or by going to Manage -> My Profile:
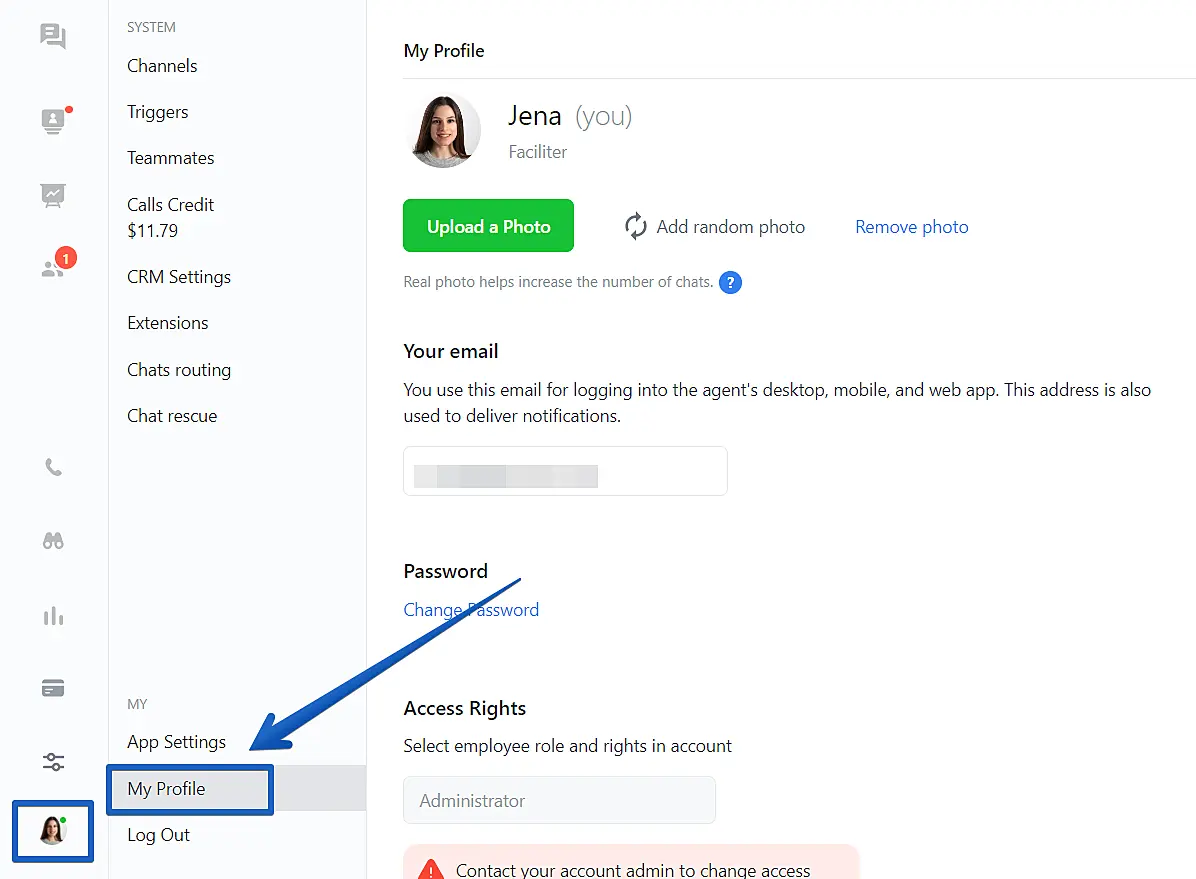
That's all!

