
Gmail — setting up auto-forwarding
Make your workflow even more efficient by handling incoming emails in JivoChat app. You just need to set up auto-forwarding in your mailbox to make it happen.
Here's a step-by-step instruction for Gmail:
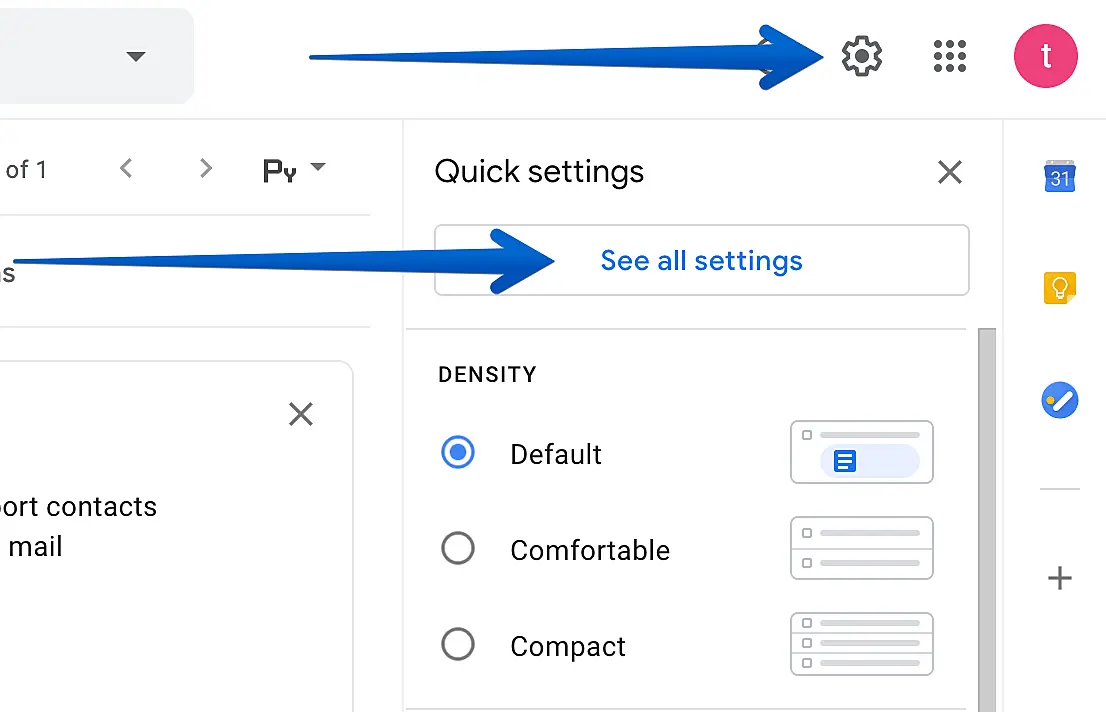
1. Start with opening your Gmail account and go to "Settings" > "See all settings".
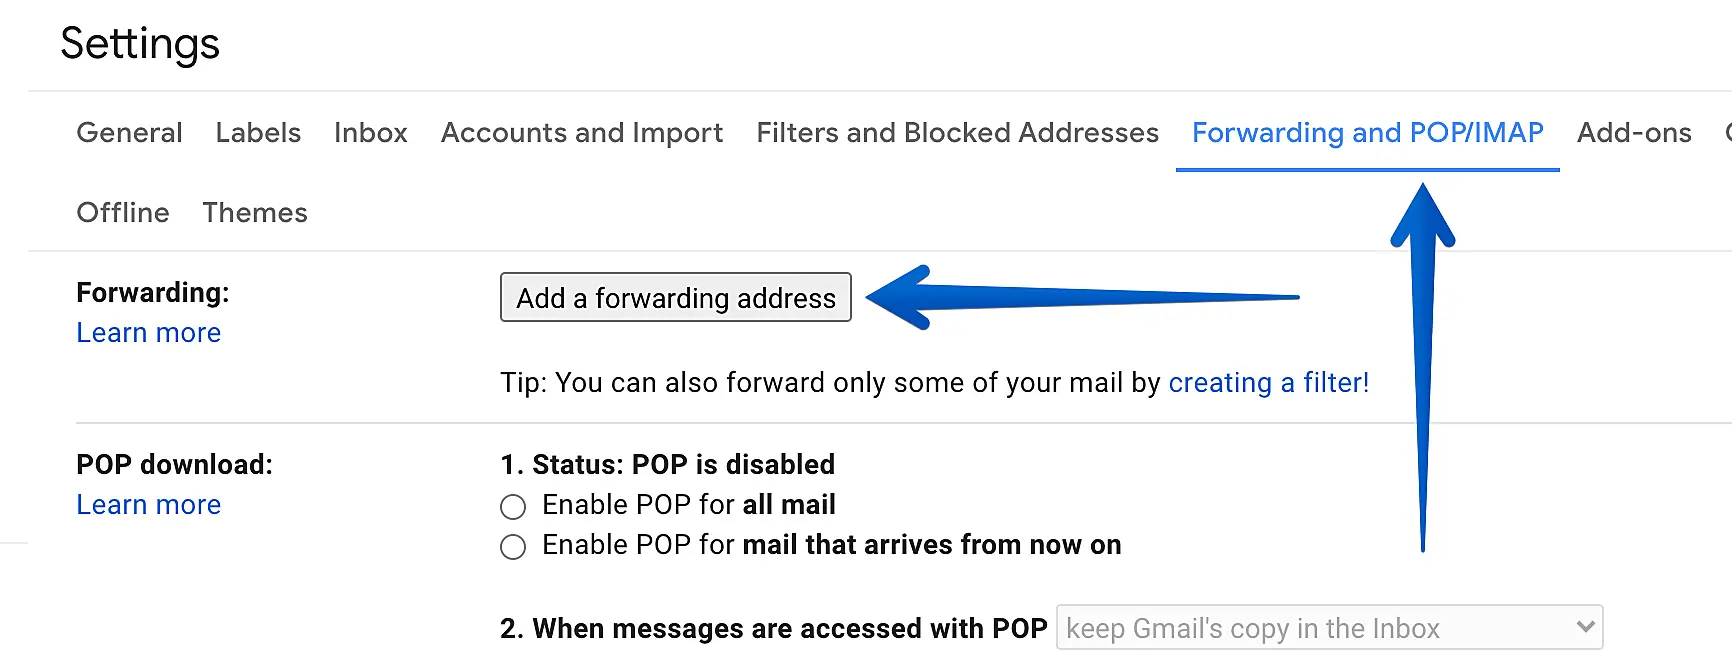
2. Then go to "Forwarding and POP/IMAP" section and click "Add a forwarding address".
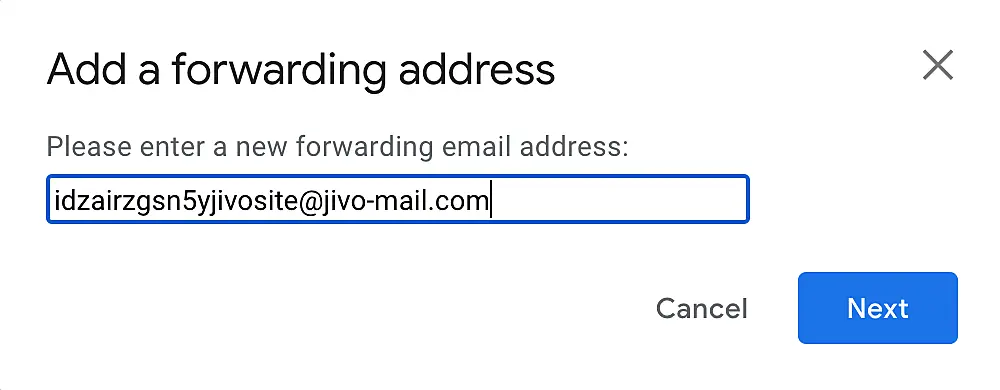
3. Paste e-mail address from JivoChat channel in the popped up form.
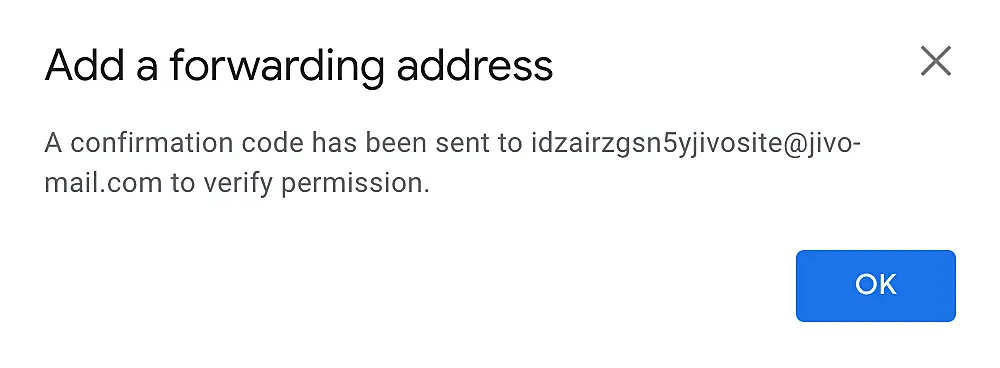
4. After that check your JivoChat app, you should get a new message from Google containing the link to confirm forwarding your mail. Click on the link and press "Confirm".
5. After that, activate forwarding a copy of incoming mail to the confirmed address and press "Save".
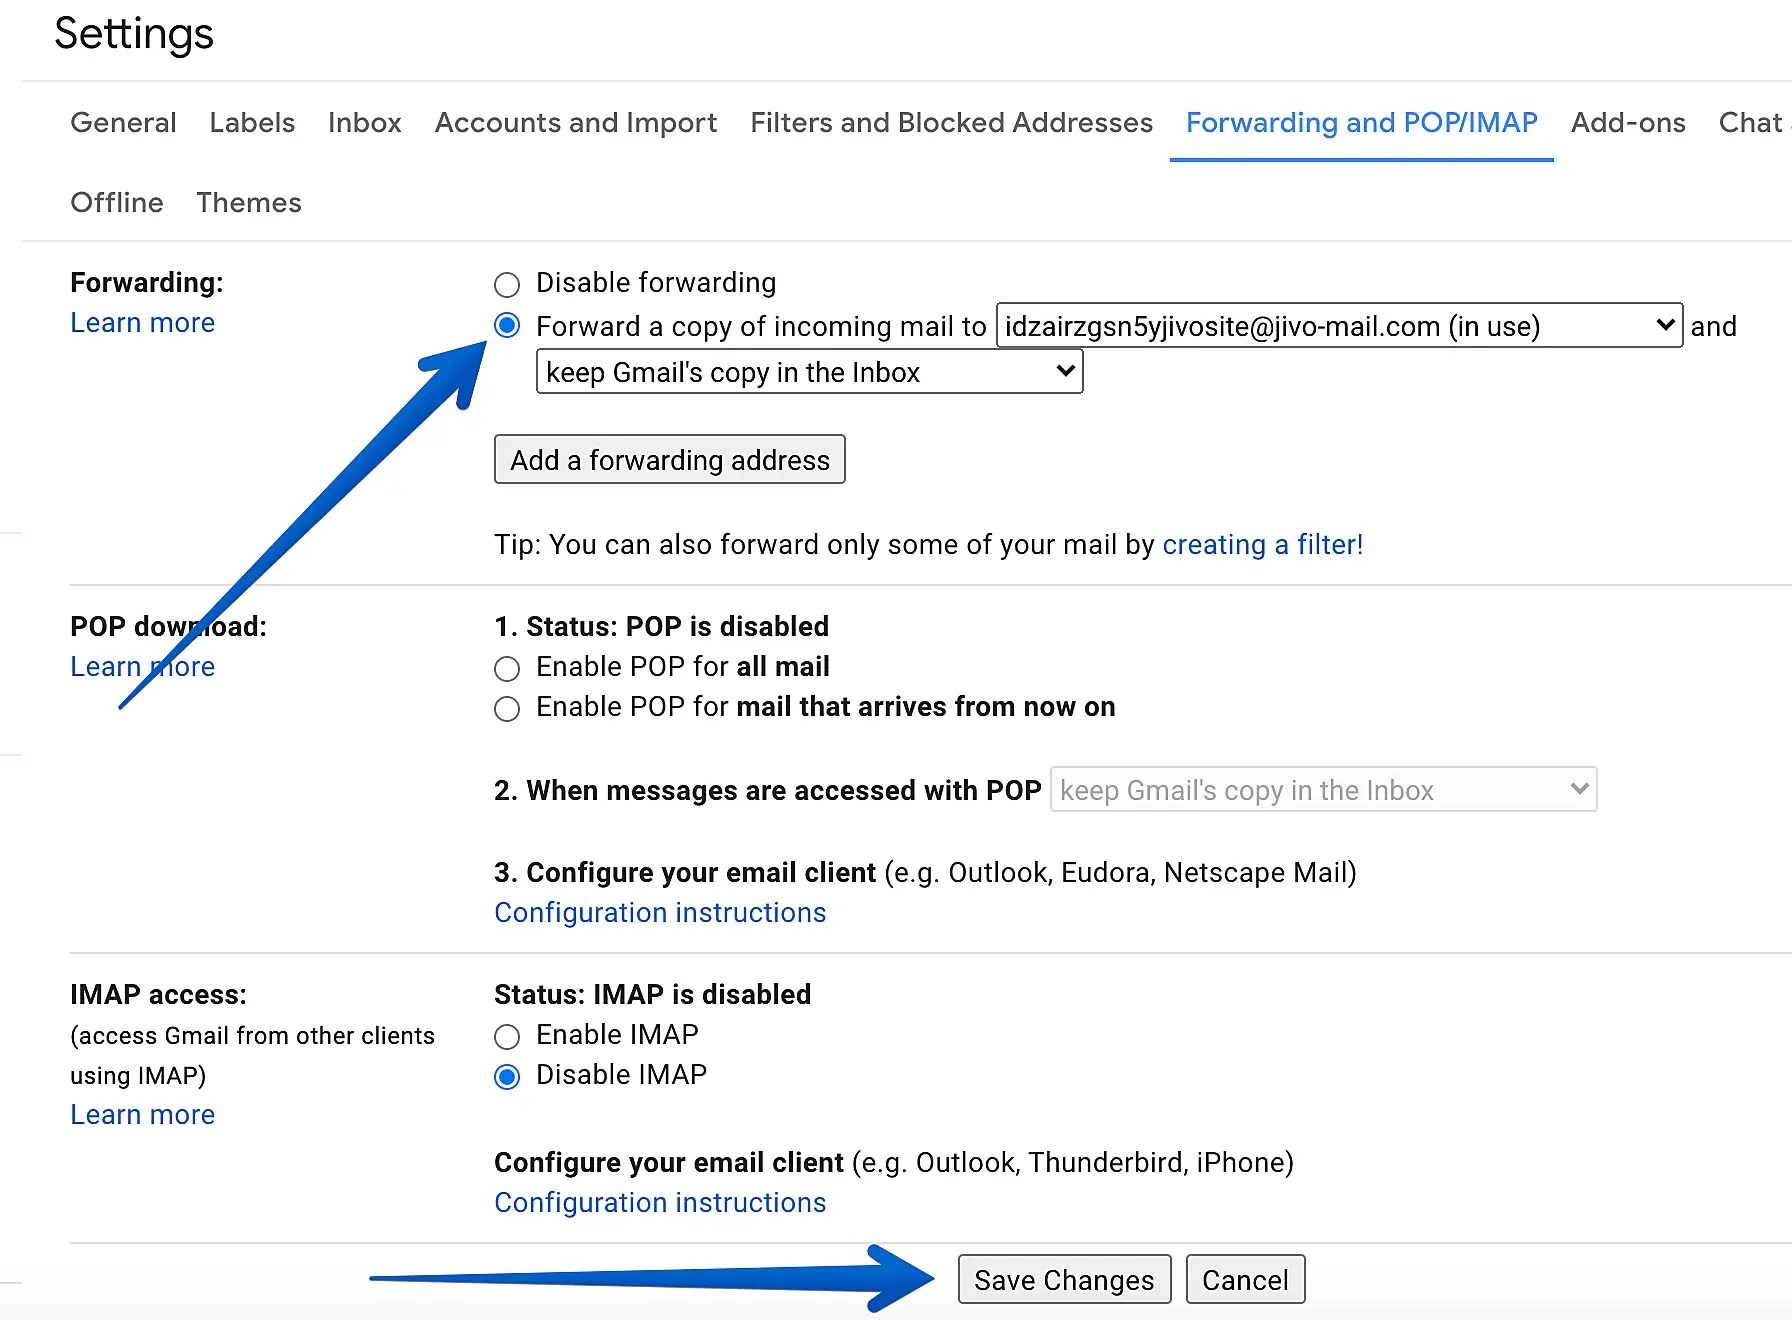
That's all! From now on you'll be getting all new emails to JivoChat app.
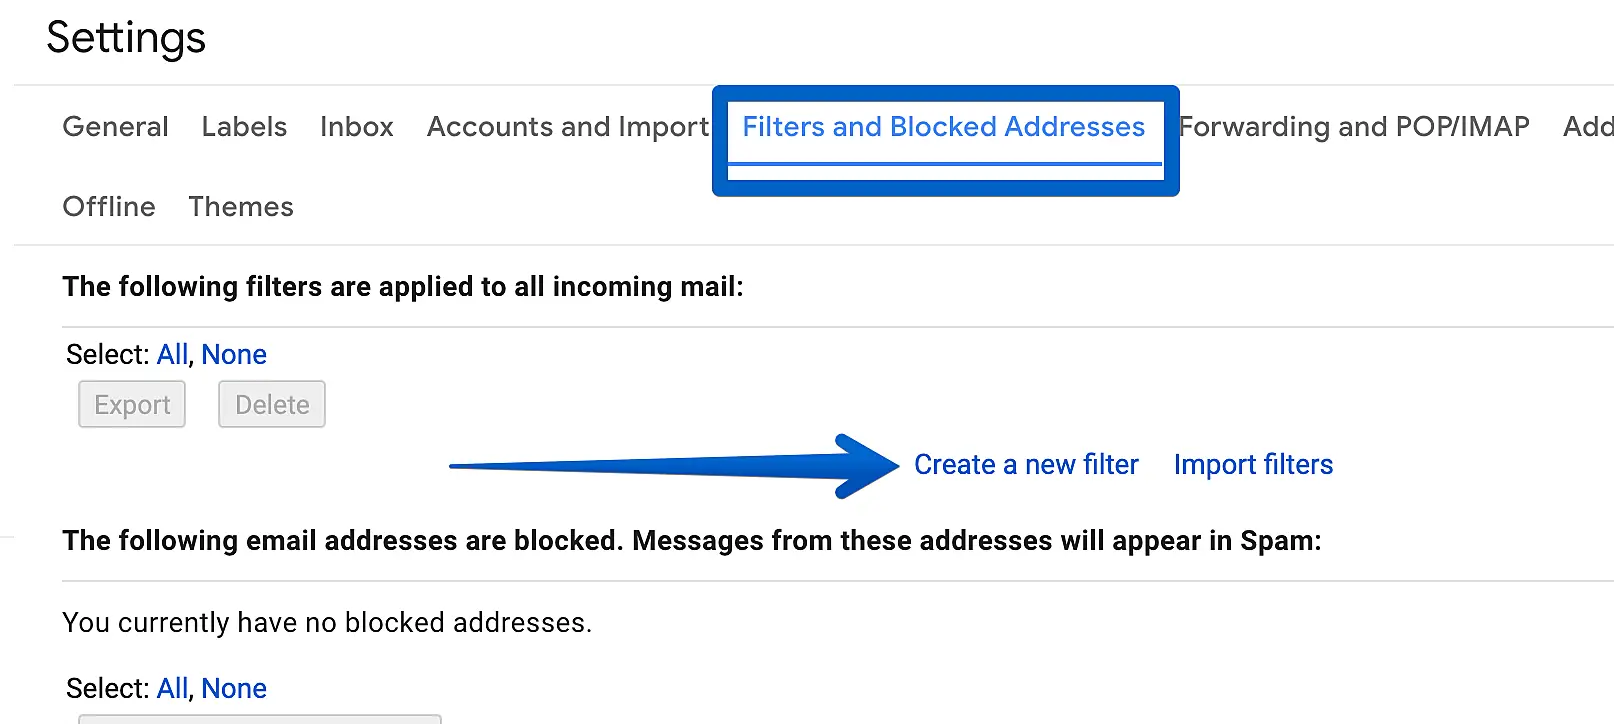
Setting up filters
In some cases you don't need all incoming mail in JivoChat, so we'll have to set up a filter. Let's add a filter for emails containing the word "order" as an example.
In your Gmail account go to "Settings" > "See all settings" > "Filters and Blocked Addresses" and click on "Create a new filter".
Configure the parameters you need only. You can specify the address you're getting emails that you need to redirect from and put your key words in "Has the words" field.
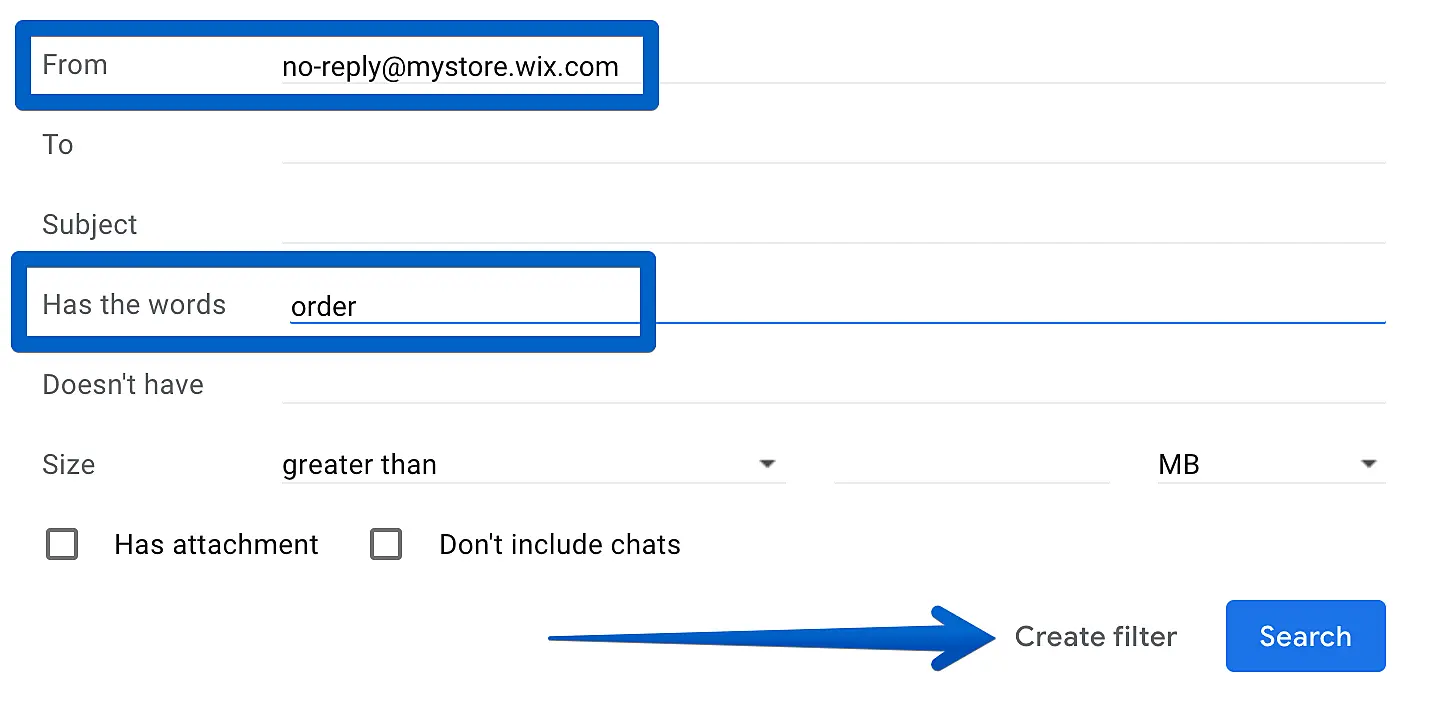
Then select what you need to be done with the filtered emails — "Forward it to:"(select JivoChat email) and press "Create filter".
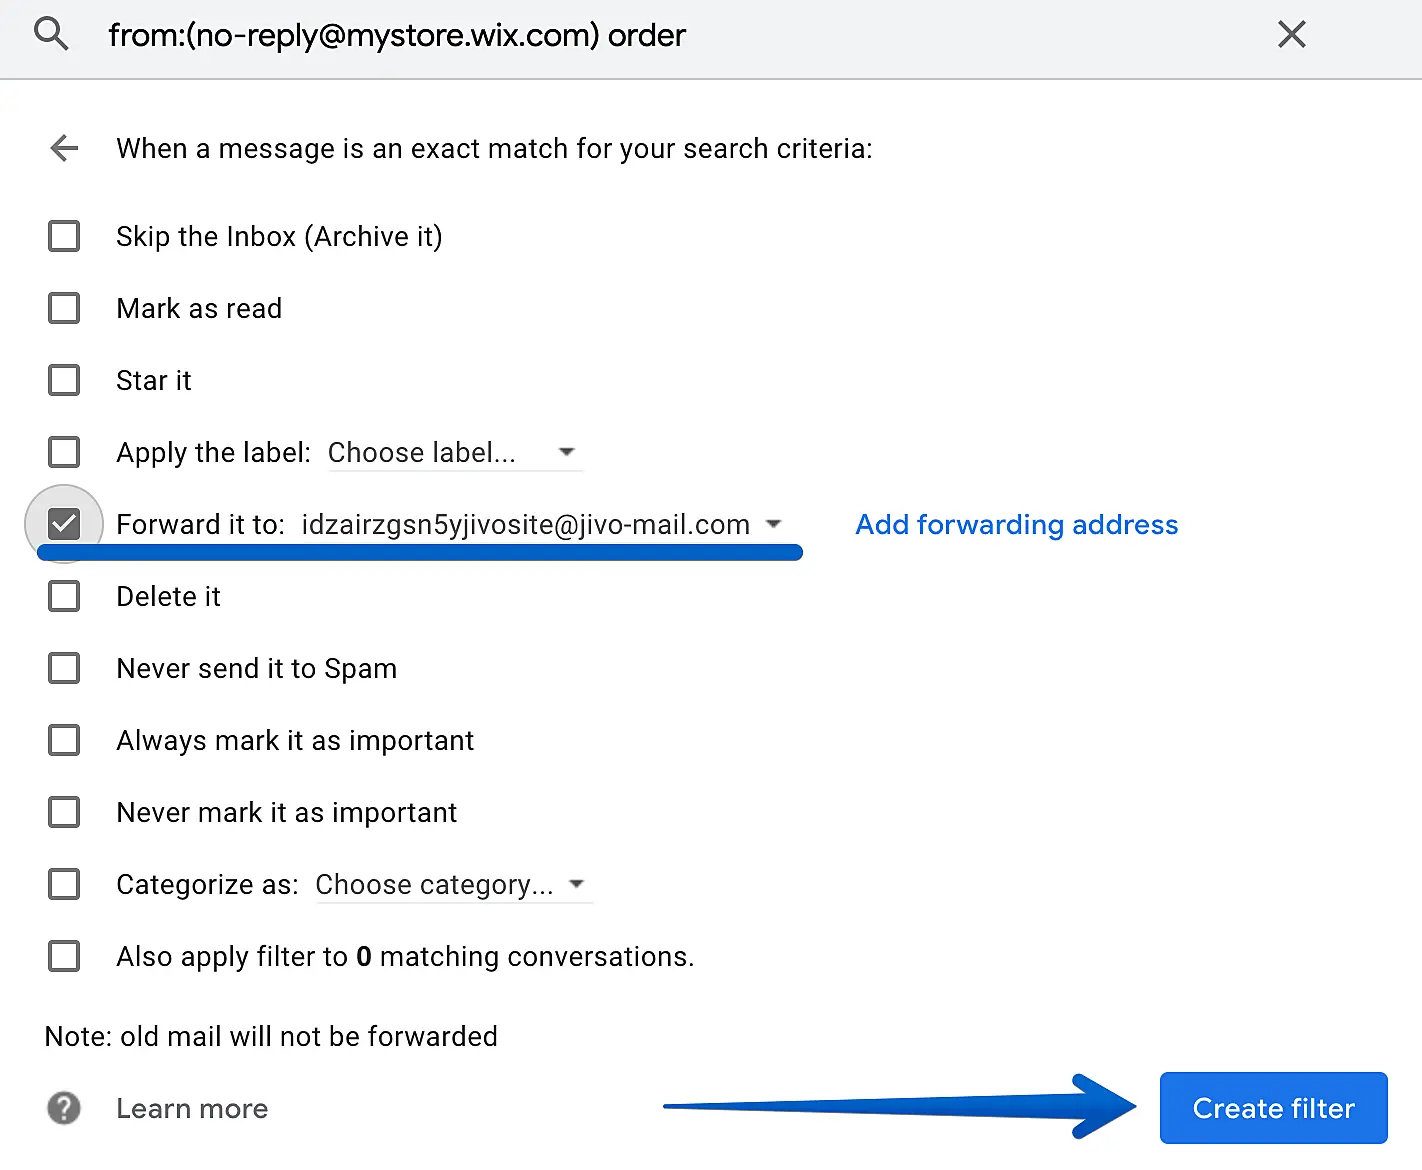
Done. You'll be receiving in JivoChat emails you need only.

