

Working with messages in JivoChat
In this article, we will discuss about the Contact Center and CRM sections of the JivoChat app and how to work with messages from clients.
In the recent versions of our application, the customer service system has been optimized. The "Inbox", "My dialogs" and "Archives" menu have been combined into a new section called "Contact Center". Thus, access to all messages is now inside a single section in the app!
Contact Center is the very first section of the application. It is located in the upper left corner of the app and stores all conversations with customers, as well as calls. It contains 3 tabs - Inbox, My dialogs, and Archives. Let's check each of them in more details.
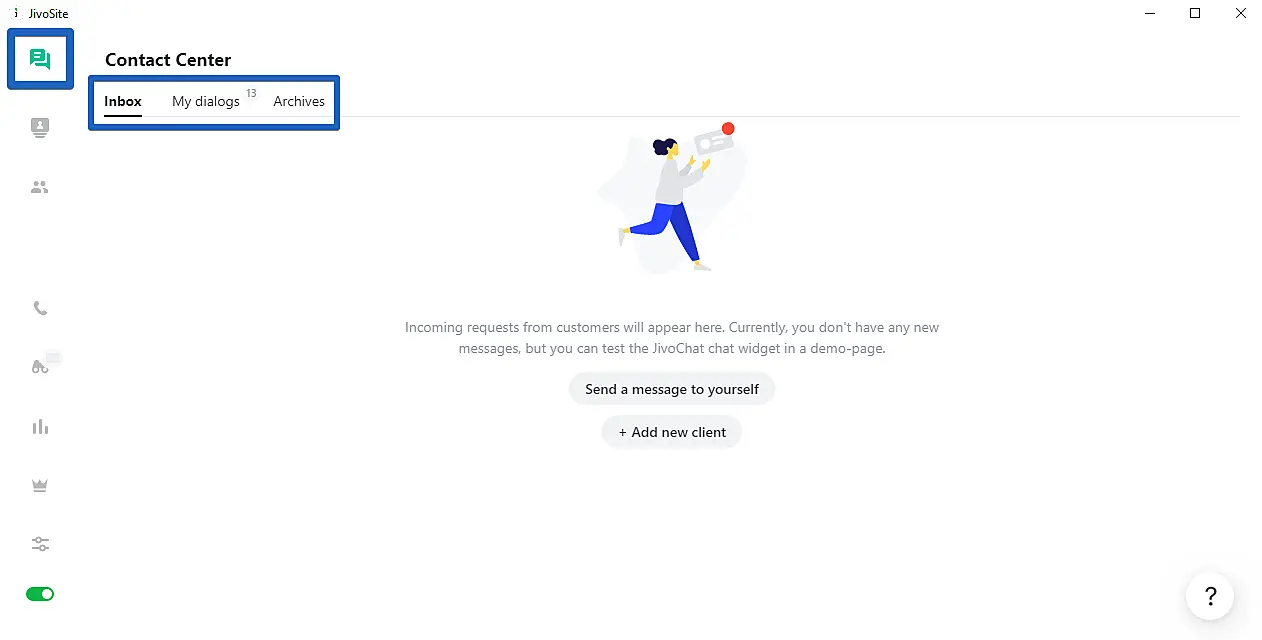
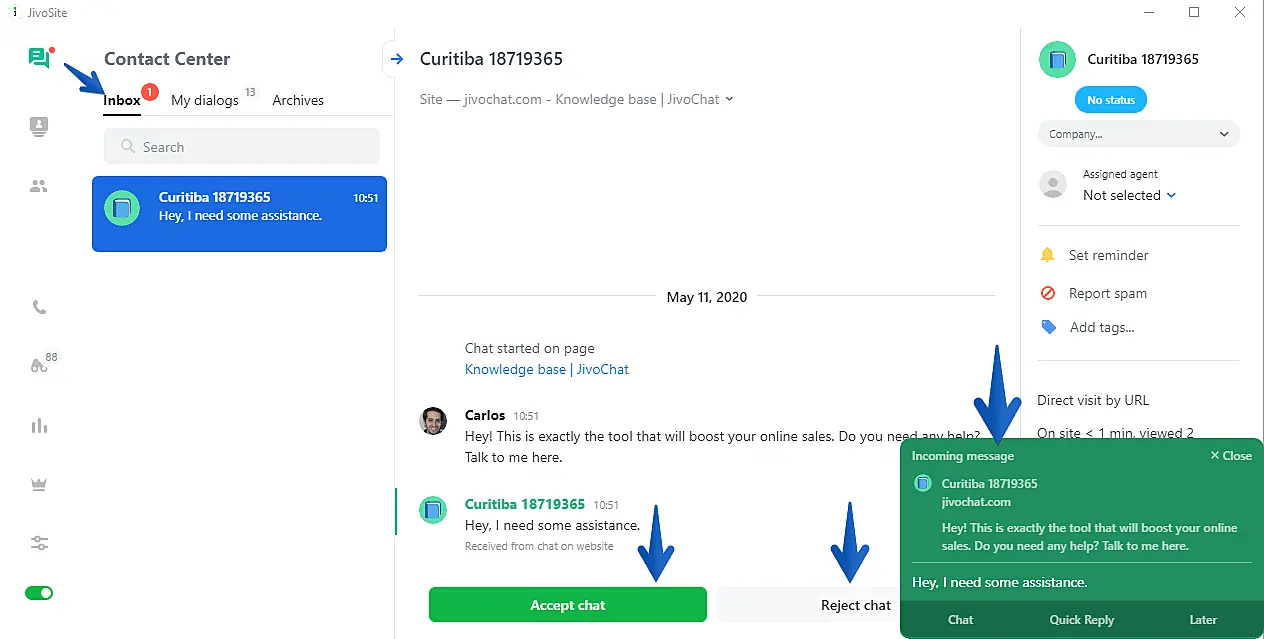
The Inbox tab contains all new chats that have not yet been accepted by any agents. On this tab, you can accept or reject dialogs. When you reject a dialog, you will hide its notification for a short time. However, it will return to the Inbox tab after some time and will continue reappearing until the dialogue is accepted by one of the available agents.
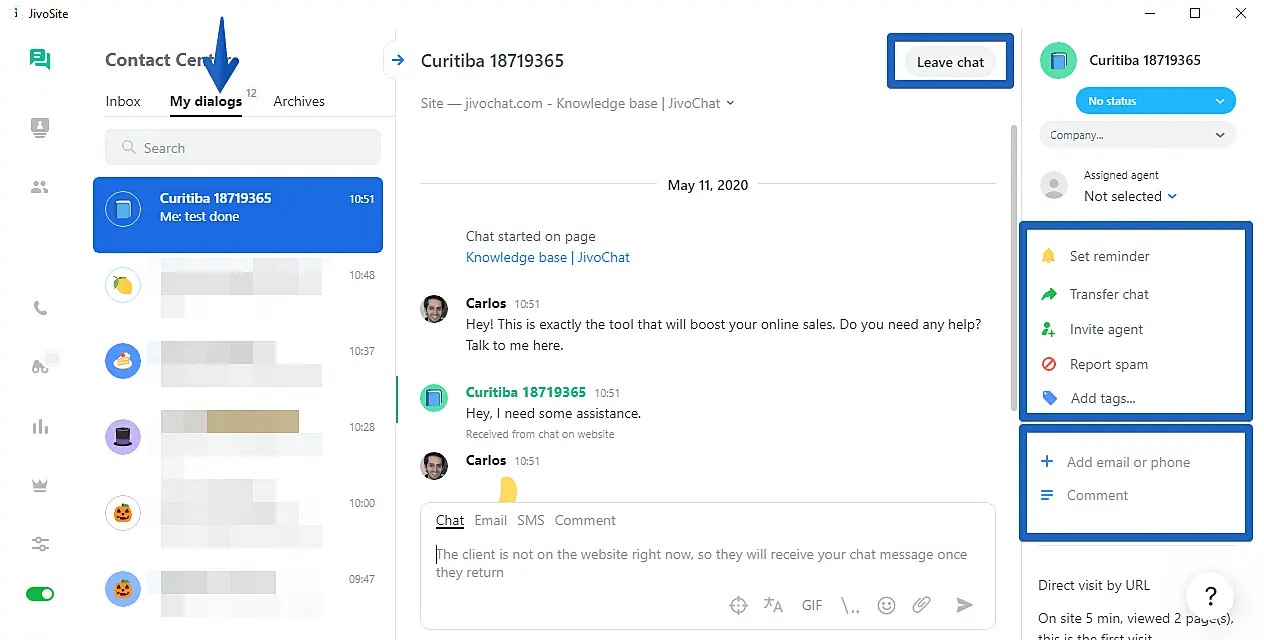
The My dialogs tab contains all your open dialogs with clients. On this tab, communication with customers takes place. In addition to the conversation log and the text input field, there is also an info panel with information about the client and chat control buttons: set a task, transfer a chat or invite a colleague to join a conversation, report spam, and others. At the top right you can find the Leave chat button. By clicking on it, you will close the chat and send it to the Archives tab.
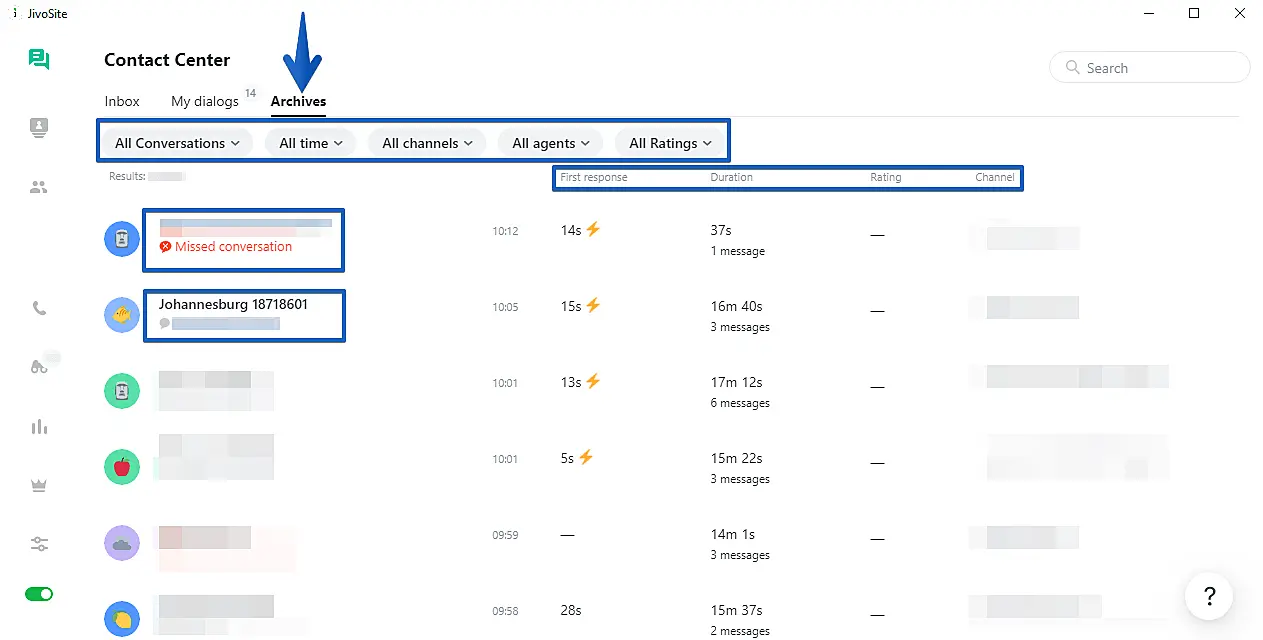
The Archives tab allows you to see all completed conversations and a few statistics data on each of them. You can use filters or the search option at the top of the window to find specific conversations. We also added a very cool feature - the ability to join a chat with a client without leaving the Archives tab. Just click the Join chat button and send messages to clients at any moment very quickly, after which you can easily return to the search results.
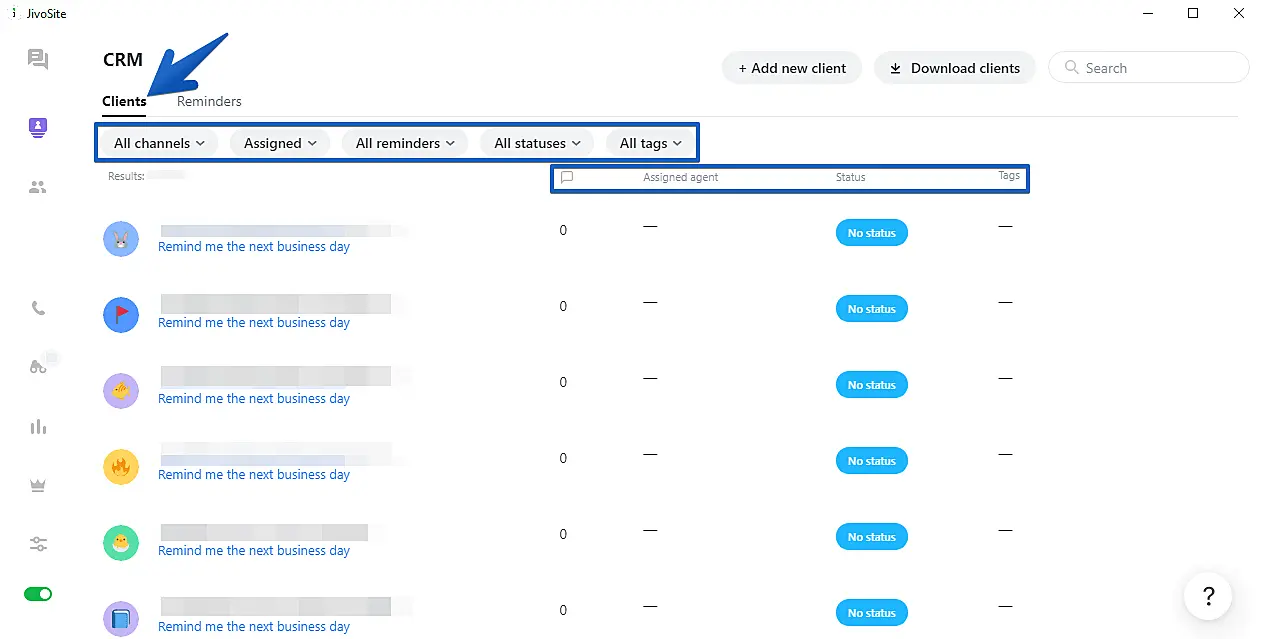
In the app, you will also find a section called CRM for working directly with the list of existing clients. In this section, managers can choose which clients they'll work with on each day - by the presence of a reminder, by statuses or tags.
The Clients tab speaks for itself - here you'll find the list of customers that you talked to through JivoChat. The entire history of the conversation with each client is available and also a few statistics such as the total number of conversations, information about the assigned agent, the statuses of clients, and the tags added to each of them. Just like in the Archives, filters and search are also available here. In addition, you can manually add a new client or download the list of clients to a file.
That's all! Now you've learned how to use the Contact Center and CRM sections of the JivoChat application.
We wish you a very productive day!

